
Disclosure: This post may contain affiliate links. Commissions may be earned at no extra cost to you. Content is for informational purposes only and not professional advice.
Connecting Claude to Canva and Blotato takes about ten minutes of clicking, but most beginners hit the same wall right after: they don’t know what to actually type once the connection is live. This guide covers both parts, the setup and your first working prompt, so you’re not left staring at a connected tool with no idea what to ask it.
5-Minute Version
- You connect both tools from Claude’s Settings, then Connectors menu; Canva is a free directory connector, Blotato is added as a custom connector using the server address https://mcp.blotato.com/mcp.
- Canva’s connector is free to link, but a Canva Pro or Business account is needed to use brand kits and premium templates once connected.
- Blotato has no free tier. Its Starter plan is $29/month for up to 20 connected accounts and 1,250 AI credits; that plan has to be active before its connector will do anything.
- On claude.ai, Claude Desktop, or Claude Cowork, Blotato authenticates through OAuth (you log into Blotato in your browser and approve), not by pasting an API key. The API key method is for Claude Code and other non-Claude.ai tools.
- Run a “product tour” prompt right after connecting, asking Claude to list what it can actually do with each tool. This is faster than guessing and prevents you from assuming a feature exists that doesn’t.
- Both connectors only work while you’re in an active chat with Claude, toggled on for that conversation. Neither runs on a schedule or trigger on its own.
Why Connect Tools to Claude Instead of Copying Between Apps?
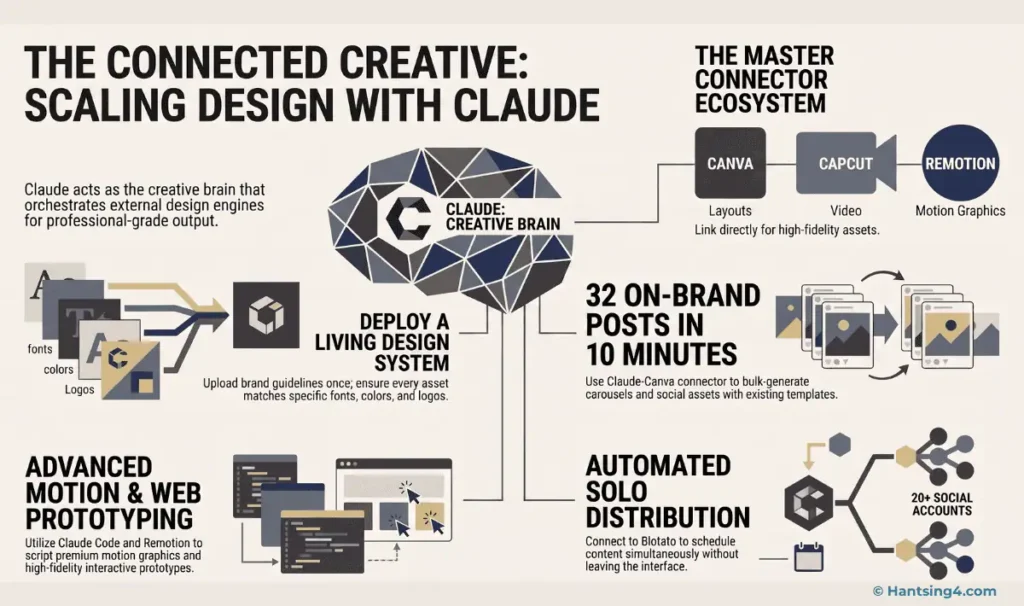
Connecting tools to Claude removes the copy-and-paste step between having an idea and having it live. Without a connection, using Claude for social media means: ask Claude for copy, copy the text, open Canva, paste it in, design the graphic, export it, open your scheduler, upload the file, and paste the caption again. Each step is small, but doing it for every post adds up over a week.
A connector, technically called an MCP (Model Context Protocol) connector, lets Claude call another application’s tools directly from the chat. Instead of you moving content between apps, you describe what you want once, and Claude routes the request to Canva or Blotato on your behalf. You still review and approve the result. The connector removes the manual handoff, not your judgment over what gets published.
What Do You Need Before You Start?
Three accounts need to already exist before you connect anything: a Claude account, a Canva account, and a Blotato account. You do not need Claude Code, Claude Desktop, or any command-line tool for this particular setup; everything here runs inside claude.ai in a normal browser tab.
Canva’s free plan is enough to connect and test the integration, though you’ll want Canva Pro (roughly $12 to $18 a month depending on billing cycle) once you’re actually producing branded work, since the free plan blocks background removal and the brand kit features that keep AI output on-brand. Blotato is the one account on this list with a hard cost, and a specific one: the Starter plan is $29 a month for up to 20 connected social accounts and 1,250 monthly AI credits, and there is no free tier for the connector Claude actually needs.
How Do You Connect Canva to Claude?
You connect Canva through Claude’s built-in Connectors directory, a first-party integration Canva and Anthropic both maintain, so no separate developer account or API key is needed on your end.
- Log in to claude.ai and open Settings, usually from your profile icon in the corner.
- Find the Connectors section. Anthropic has reorganized this menu more than once, so if it’s not where you expect, check under your profile or a “Customize” option instead.
- Browse or search for Canva and select Connect.
- A window opens asking you to log into Canva and approve the specific permissions Claude is requesting. Review these before approving; this is the step that actually authorizes the connection.
- Back in a chat, open the connectors icon for that conversation and toggle Canva on. The connection exists account-wide, but it needs to be switched on per conversation.
Official setup instructions and any menu changes are documented on Canva’s own AI Connector help page, worth bookmarking since both companies update this flow periodically.
How Do You Connect Blotato to Claude?
Blotato isn’t in Claude’s first-party directory the way Canva is, so it’s added as a custom connector using a server address. How you authenticate it depends on where you’re running Claude, and this is the step most beginner guides get wrong.
- Confirm your Blotato account is on a paid plan; the connector will not work during the free trial until you activate a subscription.
- In Claude, go to Settings, then Connectors, and choose to add a custom connector.
- For the server URL, enter https://mcp.blotato.com/mcp. This address is the one most informal tutorials get slightly wrong, so it’s worth pasting exactly rather than retyping from memory.
- If you’re on claude.ai, Claude Desktop, or Claude Cowork, you’ll be prompted to log into Blotato in your browser and approve the connection. This is OAuth, and no API key is needed or requested for these three surfaces. If you’re setting this up in Claude Code, Cursor, or another MCP-compatible tool instead, you’ll paste an API key from your Blotato account’s API settings there.
- Toggle the Blotato connector on for your current conversation, the same way you did for Canva.
The full range of what the connector can do, including scheduling to your content calendar and checking post status, is documented on Blotato’s own MCP setup guide, which is worth checking directly if a step here doesn’t match what you see on screen.
Understanding Permissions: What Are You Actually Allowing?
When you approve a connector, you’re granting Claude a specific, revocable set of permissions, not blanket access to your account. It’s worth understanding the general shape of this before you click Allow on anything.
Read actions, like searching your existing Canva designs or checking which social accounts are linked in Blotato, are low-risk and reversible; Claude looking at what already exists doesn’t change anything. Write actions, like creating a new Canva design, editing an existing one, or publishing a post through Blotato, are the ones worth pausing on, since they take a real, sometimes public, action on your behalf.
Neither connector runs in the background. If you close the chat, nothing continues running unattended; a fresh conversation with the connector toggled on is required each time you want Claude to act on either tool. You can disconnect either integration at any time from the same Connectors settings menu, and Blotato requires each connected social account to be re-authorized individually if a platform’s login expires.
Your First Conversation: The Product Tour Prompt
Once both connectors are live, the fastest way to learn what they actually do is to ask Claude to describe its own capabilities, rather than guessing from memory of a tutorial you half-remember. Open a new chat, toggle on the connector you want to explore, and try a prompt along these lines:
"Describe every feature of the Canva connector in simple terms, and give me one sample prompt for each."
Claude will typically return a short, organized breakdown, feature by feature, with a sample prompt for each one. Run the same style of prompt for Blotato once you’re ready to explore scheduling. This costs you nothing but a few minutes and prevents the most common beginner mistake: assuming a feature exists (or doesn’t) instead of just asking the tool directly.
From there, a reasonable first real task is small and low-stakes: ask Claude to find one existing Canva template you already like, and describe (without publishing anything) how it would adapt it with your text. Seeing the plan before anything is created or posted is the safest way to learn the tool’s judgment before trusting it with a live account.
What Goes Wrong for Beginners
A few issues show up repeatedly for people setting this up for the first time, and knowing them ahead of time saves real frustration.
- Blotato shows “Connected” but Claude returns an authentication error. This almost always means the connector linked correctly but your Blotato subscription isn’t actually active yet. Go into Blotato’s Settings, then API, and generate an API key, even if you never paste it anywhere; doing so is what activates the paid Starter subscription and clears the error.
- Export or domain errors between Canva and Blotato. If Claude reports it can’t pass a Canva file to Blotato, it usually resolves by asking Claude to export the design first and pass the resulting file URL directly to Blotato, rather than trying to link the two apps in one step.
- Forgetting the per-conversation toggle. A connector authorized once still needs to be switched on inside each new chat where you want to use it; this trips up almost everyone at least once.
- No brand kit means generic output. Without a Canva brand kit set up, every design Claude generates will look like default AI output regardless of how detailed your prompt is.
Getting Comfortable With the Bridge You Just Built
What you’ve set up is a bridge, not an employee. Claude still needs you to open the conversation, state the goal, and check the output before anything goes public. That’s a meaningfully smaller claim than “automated social media,” and it’s the honest one.
The upside is real even with that limitation. Once the connections are live and you’ve run the product tour prompt a few times, the actual mechanics of moving from an idea to a designed, scheduled post shrink from an afternoon of tab-switching down to a single focused conversation. That’s worth the ten minutes of setup, even before you get to anything more advanced.
Once you’re comfortable with the basics here, our full playbook covering everything you can build with this stack, from single social graphics to full carousels and motion graphics, is the natural next step.